
## How to Paint Violets in Acrylic: A Comprehensive Guide
Are you captivated by the delicate beauty of violets and eager to capture their essence on canvas using acrylic paints? Whether you’re a beginner just starting your artistic journey or an experienced painter looking to refine your skills, this comprehensive guide will provide you with the knowledge and techniques you need to paint breathtaking violets in acrylic. We’ll explore everything from selecting the right materials to mastering color mixing and brushstrokes, ensuring you create stunning floral masterpieces. This guide is designed to be your go-to resource, offering expert advice and practical tips to elevate your acrylic painting skills and bring the enchanting world of violets to life on your canvas.
This guide isn’t just another tutorial; it’s a deep dive into the art of painting violets in acrylic, drawing on expert techniques and insights. We’ll cover everything from understanding the nuances of violet hues to creating realistic textures and capturing the delicate light that makes these flowers so captivating. By the end of this article, you’ll have the confidence and skills to create your own stunning violet paintings, impressing yourself and others with your artistic talent.
## Understanding Violets: A Painter’s Perspective
Before diving into the practical aspects of painting, let’s appreciate the unique characteristics of violets that make them such compelling subjects for artists. Violets are known for their vibrant colors, delicate petals, and charming simplicity. Their hues range from deep purples and blues to softer lavenders and whites, offering a rich palette for painters to explore. Understanding the anatomy of a violet, the way light interacts with its petals, and the subtle variations in color will greatly enhance your ability to capture its true beauty on canvas.
### The Color Spectrum of Violets
Violets present a fascinating color challenge for artists. The color violet itself is a secondary color, created by mixing red and blue. However, the specific shade of violet can vary greatly depending on the proportions of red and blue used, as well as the addition of other colors like white, yellow, or even green.
* **Deep Purple Violets:** These violets are rich and intense, with a strong presence of blue. They can be created by mixing ultramarine blue with alizarin crimson.
* **Lavender Violets:** These are softer and more delicate, with a higher proportion of white. Titanium white mixed with a touch of ultramarine blue and a hint of magenta will create a beautiful lavender.
* **Blue-Violet Violets:** These violets lean towards the blue side of the spectrum, often appearing cool and refreshing. Phthalo blue mixed with a small amount of quinacridone magenta can achieve this effect.
* **Red-Violet Violets:** These violets have a warmer tone, with a stronger presence of red. Mixing alizarin crimson with a touch of ultramarine blue will create a rich red-violet.
### The Anatomy of a Violet
Understanding the structure of a violet is crucial for accurately depicting it in your paintings. Violets typically have five petals: two upper petals, two side petals, and one lower petal that often has a spur or pouch. The petals are arranged in a way that creates a sense of depth and dimension. Pay close attention to the shapes of the petals, the way they overlap, and the subtle curves and folds that give them their unique character. The center of the violet, where the stamens and pistil are located, is also an important detail to capture.
### Capturing Light and Shadow
The way light interacts with the petals of a violet can dramatically affect its appearance. Light can create highlights on the edges of the petals, emphasizing their shape and texture. Shadows can add depth and dimension, revealing the subtle curves and folds of the petals. Pay close attention to the direction of the light source and how it affects the colors and values of the violet. Experiment with different lighting conditions to see how they change the appearance of the flower.
## Essential Materials for Painting Violets in Acrylic
Before you begin painting, it’s essential to gather the right materials. Here’s a comprehensive list of what you’ll need:
* **Acrylic Paints:** A variety of violet hues, including ultramarine blue, alizarin crimson, quinacridone magenta, titanium white, and a touch of yellow ochre. Having a range of colors will allow you to mix a wide variety of violet shades.
* **Brushes:** A selection of brushes in different shapes and sizes, including round brushes for detail work, flat brushes for blending, and filbert brushes for creating soft edges. Synthetic brushes are a good choice for acrylic painting.
* **Canvas or Painting Surface:** A stretched canvas, canvas board, or acrylic paper. Choose a size that suits your project. A smooth surface is generally preferred for detailed floral paintings.
* **Palette:** A palette for mixing your paints. A disposable palette or a wet palette (which keeps your paints moist) are good options.
* **Water Container:** To clean your brushes.
* **Palette Knife:** For mixing paints and applying texture.
* **Easel (Optional):** To hold your canvas at a comfortable angle.
* **Reference Photo:** A high-quality photo of violets to use as a reference. Observe the colors, shapes, and details carefully.
* **Acrylic Mediums (Optional):** Glazing medium, retarder, or flow improver to modify the properties of your acrylic paints.
## Step-by-Step Guide: Painting Violets in Acrylic
Now, let’s dive into the step-by-step process of painting violets in acrylic. We’ll break down the process into manageable steps, providing clear instructions and helpful tips along the way.
### 1. Preparing Your Canvas
Start by preparing your canvas. If you’re using a pre-primed canvas, you can skip this step. However, if your canvas is unprimed, you’ll need to apply a layer of gesso. Gesso is a white acrylic primer that creates a smooth, even surface for your paint to adhere to. Apply two or three thin coats of gesso, allowing each coat to dry completely before applying the next. Lightly sand the surface between coats for an even smoother finish.
### 2. Sketching the Outline
Using a light pencil, sketch the outline of your violets onto the canvas. Pay attention to the shapes of the petals, the arrangement of the flowers, and the overall composition. Don’t worry about getting every detail perfect at this stage; the sketch is just a guide to help you place the elements of your painting.
### 3. Blocking in the Background
Before you start painting the violets themselves, block in the background. Choose a color that complements the violets, such as a soft green or a muted blue. Apply a thin layer of paint to the background area, using a large brush. Don’t worry about creating a lot of detail at this stage; the background should be subtle and understated.
### 4. Mixing Your Violet Hues
Now comes the fun part: mixing your violet hues! Experiment with different combinations of ultramarine blue, alizarin crimson, quinacridone magenta, and titanium white to create a range of violet shades. Keep a palette knife handy for mixing, and a damp cloth to wipe it clean between colors. Start with a small amount of each color and gradually add more until you achieve the desired shade. Remember to keep track of your ratios so you can recreate the colors later if needed.
### 5. Painting the Petals
Using a small round brush, begin painting the petals of the violets. Start with the darkest areas of the petals, using a deep purple or blue-violet shade. Gradually add lighter shades of violet to create highlights and shadows. Pay attention to the direction of the light source and how it affects the colors and values of the petals. Use short, delicate brushstrokes to capture the texture of the petals. Blend the colors together smoothly to create a seamless transition between shades.
### 6. Adding Details
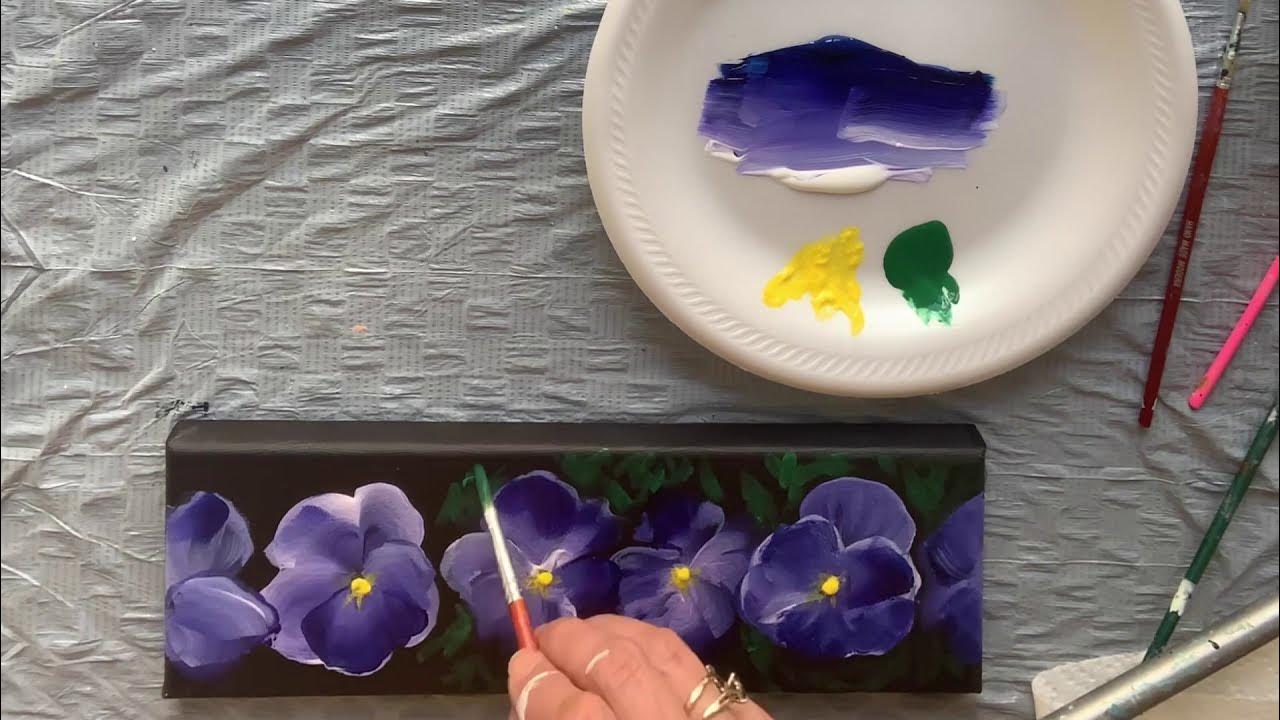
Once you’ve painted the basic shapes and colors of the petals, it’s time to add details. Use a very small round brush to paint the veins and markings on the petals. Add highlights to the edges of the petals to emphasize their shape. Paint the center of the violet with a touch of yellow ochre or a light green to represent the stamens and pistil.
### 7. Painting the Leaves and Stems
Use a small brush and a mix of greens to paint the leaves and stems of the violets. Observe the shapes and colors of the leaves carefully, and try to capture their unique characteristics. Add highlights and shadows to create depth and dimension. Use thin, delicate brushstrokes to represent the texture of the leaves.
### 8. Refining and Blending
Step back from your painting and assess your work. Look for areas that need refinement or blending. Use a clean, dry brush to soften any harsh edges or blend colors together. Add more highlights or shadows to enhance the depth and dimension of the painting. Continue to refine and adjust the painting until you’re satisfied with the result.
### 9. Adding Final Touches
Once you’re happy with the overall painting, add any final touches. This might include adding a few more details to the petals, leaves, or background. You can also add a glaze of color to the entire painting to unify the colors and create a sense of atmosphere. A glaze is a thin, transparent layer of paint that is applied over the entire surface of the painting. To create a glaze, mix a small amount of paint with a glazing medium. Apply the glaze with a large brush, and allow it to dry completely.
### 10. Varnishing Your Painting
Once your painting is completely dry, you can varnish it to protect it from dust, dirt, and UV light. Varnish also enhances the colors of the painting and gives it a professional finish. Choose a varnish that is specifically designed for acrylic paintings. Apply two or three thin coats of varnish, allowing each coat to dry completely before applying the next. Follow the manufacturer’s instructions carefully.
## Choosing the Right Acrylic Paints for Violets: A Deep Dive
The quality of your acrylic paints can significantly impact the outcome of your violet paintings. Not all acrylic paints are created equal, and some are better suited for certain techniques and styles than others. When choosing acrylic paints for painting violets, consider the following factors:
* **Pigment Quality:** Look for paints that are made with high-quality pigments. High-quality pigments are more vibrant, lightfast (resistant to fading), and mix more cleanly than lower-quality pigments. Professional-grade acrylic paints typically use higher-quality pigments than student-grade paints.
* **Opacity and Transparency:** Consider the opacity and transparency of the paints. Opaque paints cover the underlying layers of paint, while transparent paints allow the underlying layers to show through. Transparent paints are ideal for glazing and creating subtle color effects. For painting violets, you’ll want a mix of opaque and transparent paints to create depth and dimension.
* **Viscosity:** The viscosity of the paint refers to its thickness or thinness. Some acrylic paints are thick and buttery, while others are thin and fluid. The viscosity of the paint can affect how it handles and blends. For painting violets, a medium-viscosity paint is generally recommended.
* **Brand Reputation:** Choose paints from reputable brands that are known for their quality and consistency. Some popular brands of acrylic paints include Golden, Liquitex, Winsor & Newton, and Utrecht.
## Mastering Color Mixing for Realistic Violet Hues
Color mixing is an essential skill for any painter, and it’s especially important for painting violets. The color violet is a complex color that can be difficult to mix accurately. However, with a little practice and understanding of color theory, you can master the art of color mixing and create realistic violet hues.
* **Understanding the Color Wheel:** The color wheel is a visual representation of the relationships between colors. It shows how the primary colors (red, yellow, and blue) can be mixed to create the secondary colors (orange, green, and violet) and the tertiary colors (red-orange, yellow-orange, yellow-green, blue-green, blue-violet, and red-violet). Understanding the color wheel will help you predict how colors will mix and create the desired results.
* **Mixing Violet from Primary Colors:** The most basic way to mix violet is to combine red and blue. However, the specific shade of violet you create will depend on the type of red and blue you use. For example, mixing a warm red (such as cadmium red) with a cool blue (such as ultramarine blue) will create a more purple-violet. Mixing a cool red (such as alizarin crimson) with a warm blue (such as cerulean blue) will create a more blue-violet.
* **Adjusting the Value and Intensity:** Once you’ve mixed your basic violet hue, you can adjust its value (lightness or darkness) by adding white or black. You can also adjust its intensity (brightness or dullness) by adding a complementary color (the color opposite violet on the color wheel, which is yellow). Adding a small amount of yellow will dull the violet and make it appear more natural.
* **Creating a Color Chart:** A color chart is a useful tool for practicing and documenting your color mixing experiments. Create a chart with different combinations of red, blue, and other colors, and label each swatch with the colors and ratios you used. This will help you recreate your favorite violet hues in the future.
## Advanced Techniques for Painting Violets in Acrylic
Once you’ve mastered the basic techniques of painting violets in acrylic, you can explore some advanced techniques to add more depth, dimension, and realism to your paintings.
* **Glazing:** Glazing is a technique of applying thin, transparent layers of paint over the underlying layers. Glazing can be used to create subtle color effects, add depth and dimension, and unify the colors of the painting. To create a glaze, mix a small amount of paint with a glazing medium. Apply the glaze with a large brush, and allow it to dry completely before applying the next layer.
* **Dry Brushing:** Dry brushing is a technique of applying paint with a dry brush. This creates a textured, broken effect that is ideal for representing rough surfaces or foliage. To dry brush, load a small amount of paint onto a dry brush, and then wipe off most of the paint with a paper towel. Apply the paint to the canvas with light, quick strokes.
* **Impasto:** Impasto is a technique of applying paint thickly to the canvas. This creates a textured, three-dimensional effect that is ideal for representing highlights or creating a sense of energy and movement. To create impasto, use a palette knife or a stiff brush to apply thick layers of paint to the canvas.
* **Scumbling:** Scumbling is a technique of applying paint with a scrubbing motion. This creates a soft, hazy effect that is ideal for representing atmospheric perspective or creating a sense of depth. To scumble, load a small amount of paint onto a brush, and then scrub the paint onto the canvas with a circular motion.
## Common Mistakes to Avoid When Painting Violets in Acrylic
Even experienced painters can make mistakes when painting violets in acrylic. Here are some common mistakes to avoid:
* **Using Too Much Paint:** Acrylic paint dries quickly, so it’s important to avoid using too much paint at once. Applying thick layers of paint can lead to cracking and peeling.
* **Not Blending Colors Properly:** Blending colors is essential for creating a smooth, seamless transition between shades. Make sure to blend your colors thoroughly to avoid harsh lines or abrupt changes in value.
* **Ignoring the Light Source:** The direction of the light source is crucial for creating realistic shadows and highlights. Pay attention to the light source and how it affects the colors and values of the violets.
* **Overworking the Painting:** It’s easy to get carried away and overwork your painting, adding too many details or refining the colors too much. Step back from your painting periodically to assess your work and avoid overworking it.
## Product Spotlight: Golden Artist Colors Heavy Body Acrylics
When it comes to acrylic paints, Golden Artist Colors Heavy Body Acrylics are a top choice among professional artists. These paints are known for their exceptional pigment quality, vibrant colors, and smooth, buttery consistency. They are made with 100% acrylic polymer emulsion and are highly resistant to fading and cracking. Golden Heavy Body Acrylics are available in a wide range of colors, including a variety of violet hues that are perfect for painting violets.
### Key Features of Golden Heavy Body Acrylics
* **High Pigment Load:** Golden Heavy Body Acrylics are made with a high concentration of pigment, resulting in vibrant, intense colors.
* **Excellent Lightfastness:** These paints are highly resistant to fading, ensuring that your paintings will retain their colors for years to come.
* **Smooth, Buttery Consistency:** The smooth, buttery consistency of Golden Heavy Body Acrylics makes them easy to handle and blend.
* **Versatile:** These paints can be used for a wide range of techniques, including glazing, dry brushing, impasto, and scumbling.
* **Archival Quality:** Golden Heavy Body Acrylics are made with archival-quality materials, ensuring that your paintings will last for generations.
### Advantages of Using Golden Heavy Body Acrylics for Painting Violets
* **Vibrant Colors:** The high pigment load of Golden Heavy Body Acrylics ensures that your violet paintings will be vibrant and eye-catching.
* **Excellent Blending:** The smooth, buttery consistency of these paints makes them easy to blend, allowing you to create seamless transitions between shades.
* **Versatile Techniques:** Golden Heavy Body Acrylics can be used for a wide range of techniques, allowing you to experiment and create unique effects in your violet paintings.
* **Long-Lasting Results:** The excellent lightfastness of these paints ensures that your violet paintings will retain their colors for years to come.
### Potential Limitations of Golden Heavy Body Acrylics
* **Higher Price Point:** Golden Heavy Body Acrylics are more expensive than student-grade acrylic paints.
* **Thick Consistency:** The thick consistency of these paints may not be suitable for all techniques, such as glazing. You may need to thin the paints with a medium for certain applications.
## Alternatives to Golden Heavy Body Acrylics
While Golden Heavy Body Acrylics are a top choice, there are several other excellent brands of acrylic paints that you can consider for painting violets. Two popular alternatives are:
* **Liquitex Heavy Body Acrylics:** Liquitex Heavy Body Acrylics are another popular choice among professional artists. They offer a similar range of colors and a similar consistency to Golden Heavy Body Acrylics, but they are generally more affordable.
* **Winsor & Newton Professional Acrylics:** Winsor & Newton Professional Acrylics are known for their high pigment quality and excellent lightfastness. They are available in a wide range of colors and offer a smooth, buttery consistency.
## Q&A: Expert Insights on Painting Violets in Acrylic
**Q1: What’s the best way to achieve a realistic velvety texture on violet petals using acrylics?**
A: The key is layering and dry brushing. Start with a smooth base coat, then build up texture with dry brush strokes using slightly lighter and darker shades of violet. A touch of glazing medium can help soften the edges and create a more velvety effect.
**Q2: How can I prevent my acrylic violets from looking flat and one-dimensional?**
A: Focus on creating depth through value contrast. Use a range of light and dark shades to define the shapes of the petals and create a sense of volume. Pay attention to the direction of the light source and how it affects the colors and values of the violets.
**Q3: What’s the secret to mixing the perfect lavender color for delicate violets?**
A: Start with titanium white and gradually add a touch of ultramarine blue and a hint of quinacridone magenta. Be careful not to add too much blue or magenta, as it can quickly overpower the white. A touch of yellow ochre can also help to warm up the lavender and make it appear more natural.
**Q4: How do I create a sense of atmospheric perspective in my violet paintings?**
A: Use cooler, lighter colors for the violets in the background and warmer, darker colors for the violets in the foreground. You can also use a technique called scumbling to create a soft, hazy effect in the background.
**Q5: What’s the best way to paint the delicate veins on violet petals?**
A: Use a very small round brush and a slightly darker shade of violet. Apply the paint with thin, delicate strokes, following the natural curves of the petals. You can also use a fine-tipped liner brush for even more precise detail.
**Q6: How can I avoid muddy colors when mixing acrylics for violets?**
A: Avoid overmixing your colors. Mix only the amount of paint you need for each step, and clean your brush thoroughly between colors. Use a limited palette of colors to minimize the risk of muddy mixtures.
**Q7: What’s the best way to create a sense of movement in my violet paintings?**
A: Use dynamic brushstrokes and create a sense of asymmetry in the composition. You can also use a technique called blurring to create a sense of motion.
**Q8: How do I paint realistic shadows on violet petals?**
A: Use a slightly darker and cooler shade of violet for the shadows. Pay attention to the direction of the light source and how it affects the shape and position of the shadows. Blend the shadows smoothly into the lighter areas of the petals.
**Q9: What are some common mistakes to avoid when painting violets in acrylic?**
A: Avoid using too much paint, not blending colors properly, ignoring the light source, and overworking the painting. Step back from your painting periodically to assess your work and avoid making these mistakes.
**Q10: How can I add a personal touch to my violet paintings?**
A: Experiment with different techniques, colors, and compositions. Don’t be afraid to break the rules and create something unique. Let your personality shine through in your paintings.
## Conclusion: Unleash Your Creativity and Paint Stunning Violets
Painting violets in acrylic is a rewarding and enjoyable experience that can bring beauty and joy to your life. By following the tips and techniques outlined in this guide, you can master the art of painting violets and create stunning floral masterpieces. Remember to experiment with different colors, techniques, and styles to find your own unique voice as an artist.
We’ve explored the nuances of violet hues, the importance of selecting the right materials, and the step-by-step process of painting violets in acrylic. From mastering color mixing to adding those final, delicate details, you now possess the knowledge and skills to confidently capture the essence of these enchanting flowers. Embrace the challenge, unleash your creativity, and watch as your canvas transforms into a vibrant celebration of nature’s beauty. Now, share your violet paintings with the world and inspire others to discover the joy of artistic expression! Contact our expert art consultants today for personalized guidance on your next acrylic painting project.
